
How-to
How to Clean a Litter Box: How Often to Deep Clean It and What Won't Put Your Cat Off
Direct answer
Scoop daily. Every 1 to 4 weeks, depending on the litter, dump everything and scrub the box with warm water and a mild, unscented cleaner, rinse well, and let it dry completely before refilling. Skip scented and phenol-based cleaners; leftover smells can make cats avoid the box.
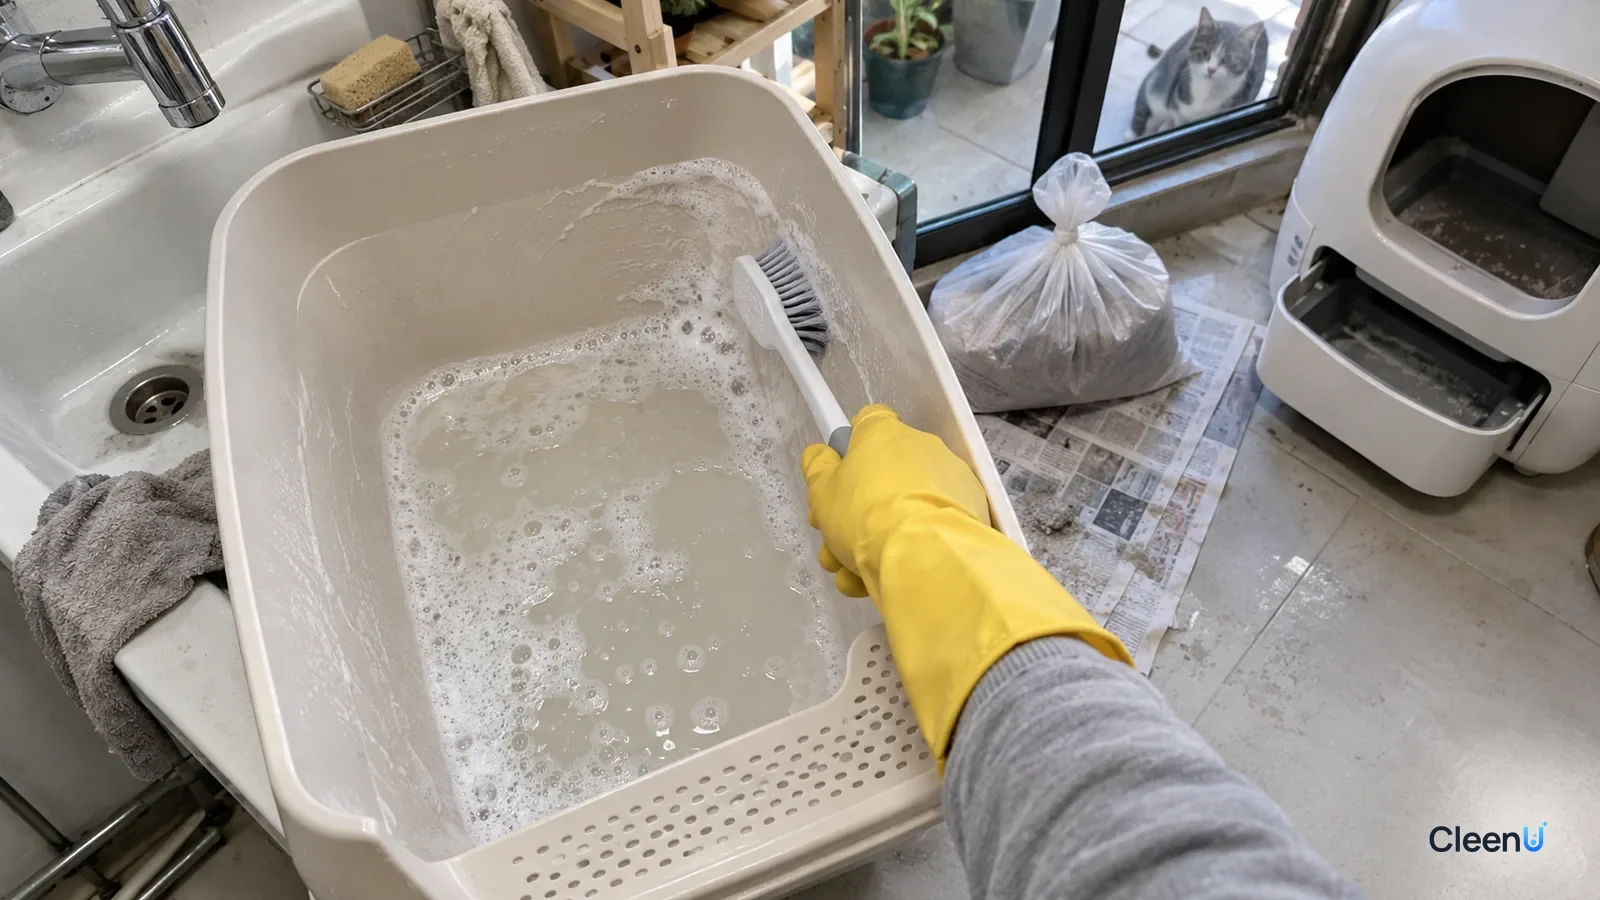
How to clean a litter box comes down to two jobs. Daily scooping keeps up with fresh clumps and waste. A deep clean, where you dump all the litter and scrub the empty box, removes what scooping leaves behind. The ASPCA recommends washing the box and replacing all the litter weekly with warm water and an unscented soap; many single-cat homes using clumping litter and scooping twice a day stretch that to every two to four weeks. The steps are simple: dump, scrape, scrub, rinse, dry, refill.
What people get wrong is usually the cleaner. A strong scent says "clean" to us but can tell your cat this is no longer its bathroom, and phenol-based disinfectants are best avoided around cats altogether. Two more things are easy to overlook: self-cleaning boxes need their sensors and waste drawer cleaned without getting the electronics wet, and anyone pregnant or with a weakened immune system should, per CDC guidance, hand the job to someone else when possible.
How often to change cat litter completely
Scooping removes today's clumps. A full change handles what scooping can't: broken clumps, urine-soaked fines, and the film stuck to the bottom and walls. That buildup accumulates until scooping no longer keeps the smell down, and that's your signal for a deep clean.
The ASPCA's weekly schedule is the safest baseline. In practice, the interval depends on the litter and the household. These are common ranges, not rules; the litter package directions come first:
| Litter type | Daily | Full change and scrub | Change early if |
|---|---|---|---|
| Clay clumping | Scoop once or twice and top up | Often every 2 to 4 weeks | More crumbs, yellowing litter, ammonia returns fast |
| Tofu or plant fiber | Scoop once or twice and top up | Often every 1 to 2 weeks | Sour or musty smell, damp bottom |
| Pine pellets | Sift and empty the tray | Often every 1 to 2 weeks | Most pellets have turned to sawdust |
| Crystal (silica gel) | Remove solids, stir | Often every 2 to 4 weeks | Beads yellow and feel damp |
| Several cats, one box | Scoop morning and evening | Noticeably shorter | Same signs as above |
Watching for those signs beats watching the calendar. Plant-based litters turn sour sooner when damp, so they usually need shorter intervals than clay. Crystal litter can go from fine to smelly fairly suddenly as it nears saturation, so don't wait for the smell.
What a deep clean actually removes, and why the brush matters most
An empty box can look clean and still carry a lot: a yellowish urine scale where salts and organic matter from urine have dried on the bottom, corners, and lower walls; smears of feces; litter dust and hair; and a slick film that bacteria build on damp surfaces, the one you can feel when you run a finger along the wall. All of it clings to the surface, and some of it sits in scratches.
Removing it relies on four factors the cleaning industry calls Sinner's circle: chemistry, mechanical action, temperature, and time. The surfactant in your cleaner lowers water's surface tension so it wets the plastic and loosens organic residue. The brush lifts that residue and the slick film, and only bristles reach into scratches. Warm water softens residue, and a few minutes of contact time let the cleaner work. Cut back on one and another has to make up for it; skip the scrubbing and you'd need harsher chemistry, which is exactly what a litter box shouldn't get.
What each factor does when you scrub a litter box
- Chemistry: the surfactant in a mild, unscented cleaner wets the plastic and loosens organic residue and waste smears into the water
- Mechanical action: a long-handled brush lifts loosened soil and the slick film; corners and scratches need bristles
- Temperature: warm water softens residue and helps the cleaner work faster, with no need for boiling water
- Time: letting the cleaner sit a few minutes before scrubbing saves effort
- Finish: rinse until there are no suds and no slippery feel, then dry completely so neither cleaner nor water ends up under fresh litter
That points to something counterintuitive. For routine cleaning, the key isn't a stronger disinfectant. It's whether you scrubbed every surface, rinsed it clean, and dried it fully. Disinfectants get used up quickly by organic matter, so pouring one over unscrubbed urine scale does little, while a box that's been scrubbed and rinsed doesn't need disinfecting for routine care. If your vet recommends disinfecting, for example when a cat is sick or a new cat is being kept apart, follow the vet's directions and the product label.
Why dry it completely? Clay and plant litters clump onto a wet bottom right away and stick there, and leftover water dampens the new litter so scale and film come back sooner. The box is dry when it doesn't feel damp and nothing has pooled in the corners.
How to deep clean a plastic litter box, a stainless one, or a self-cleaning box
Most litter boxes are polypropylene (PP) plastic. Stainless steel boxes and self-cleaning boxes are also common, and each needs slightly different handling.
| Material | Strengths | Common problems | Cleaning tips |
|---|---|---|---|
| PP plastic | Light, cheap, impact-resistant | Soft surface scratches from claws and scoops; may absorb odor over time | Soft or medium brush, no steel wool; scrape stuck clumps with plastic |
| Stainless steel | Hard, doesn't absorb odor, resists scratches | Long contact with urine salts or chlorine bleach can cause rust spots | Rinse and dry, don't soak in bleach, no steel wool |
| Self-cleaning box | Handles scooping for you | Dusty sensors misread; waste drawer and drum collect grime; electronics can't get wet | Unplug and follow the manual; wipe the base, never soak it |
Scratches are the big issue with plastic. PP is relatively soft, so digging and metal scoops leave fine grooves that hold urine film your brush can easily miss, and over time they become odor you can't wash out. Use a plastic scoop, scrape stuck clumps with a plastic scraper, and brush along the scratches.
Stainless steel is hard, doesn't absorb odor, and resists scratches, which is why many people switch to it. Its weak point is chloride: urine salts or chlorine bleach left on the surface for long periods can cause pitting. Rinse and towel-dry after each wash, and skip steel wool, which scratches the finish and can leave iron particles that rust.
How often to replace a litter box
Replace a box based on its condition, not its age. Any one of these is enough:
- A scrubbed, fully dried, empty box still smells up close.
- Scratches are deep enough to catch a fingernail, or the bottom looks worn and fuzzy.
- A yellow film in the bottom or corners won't scrub off.
- The box is cracked, warped, or has a broken rim.
The math usually favors replacing. A box that holds odor costs you extra litter and deodorizer every week, plus the risk your cat starts avoiding it. Choose smooth walls, rounded corners, and a tall enough rim, and pair it with a plastic scoop. For the first few days, mix a little old litter into the new so it smells familiar.
How to clean a litter box, step by step
Set up, dump, scrub, dry, and handle a self-cleaning box
Set up
Pick the right spot and put on gloves
Clean at a laundry sink, in the shower, or at an outdoor faucet, never in the kitchen sink or near where food is prepared. Wear rubber or disposable gloves and spread newspaper to catch splashes and litter. If someone in the home is pregnant or immunocompromised, someone else should do this.
Dump
Bag the old litter and scrape off stuck clumps
Pour all the old litter into a trash bag, tie it, and put it in a lidded bin. Scrape stuck clumps and urine cake off the bottom with a plastic scraper rather than gouging with a metal scoop.
Scrub
Warm water, mild unscented cleaner, brush the bottom, corners, and rim
Add a little warm water and a small amount of mild, unscented cleaner, let it sit two or three minutes to soften the scale, then brush the bottom, all four corners, the lower walls, the inside of the rim, and any lid or splash guard. You can also coat the empty box with a litter box odor eliminator, wait 5 minutes, then scrub.
Caution:No boiling water on plastic, no chlorine bleach mixed with other cleaners, and no steel wool.
Rinse until there are no suds and no slippery feel
Rinse inside and out two or three times, until the suds are gone and the bottom doesn't feel slick. Wipe the corners with a damp white paper towel. No yellow mark means it's clean; if there is one, scrub again.
Dry
Dry completely, then refill
Prop the box up somewhere airy, or towel it off and let it finish drying, until nothing feels damp and no water sits in the corners. Refill with fresh litter about 1 to 2 inches deep and put the box back in its usual spot.
Self-cleaning box
Unplug, take it apart, and keep the electronics dry
Unplug it first. Remove the waste drawer, tie off and remove the bag, and wipe the drawer with a damp cloth. Take out the washable drum or liner as the manual describes, empty the litter, and scrub, rinse, and dry it as above. Wipe sensor windows gently with a dry or well-wrung cloth, keep the base out of water, reassemble when everything is dry, and run one empty cycle to confirm it works.
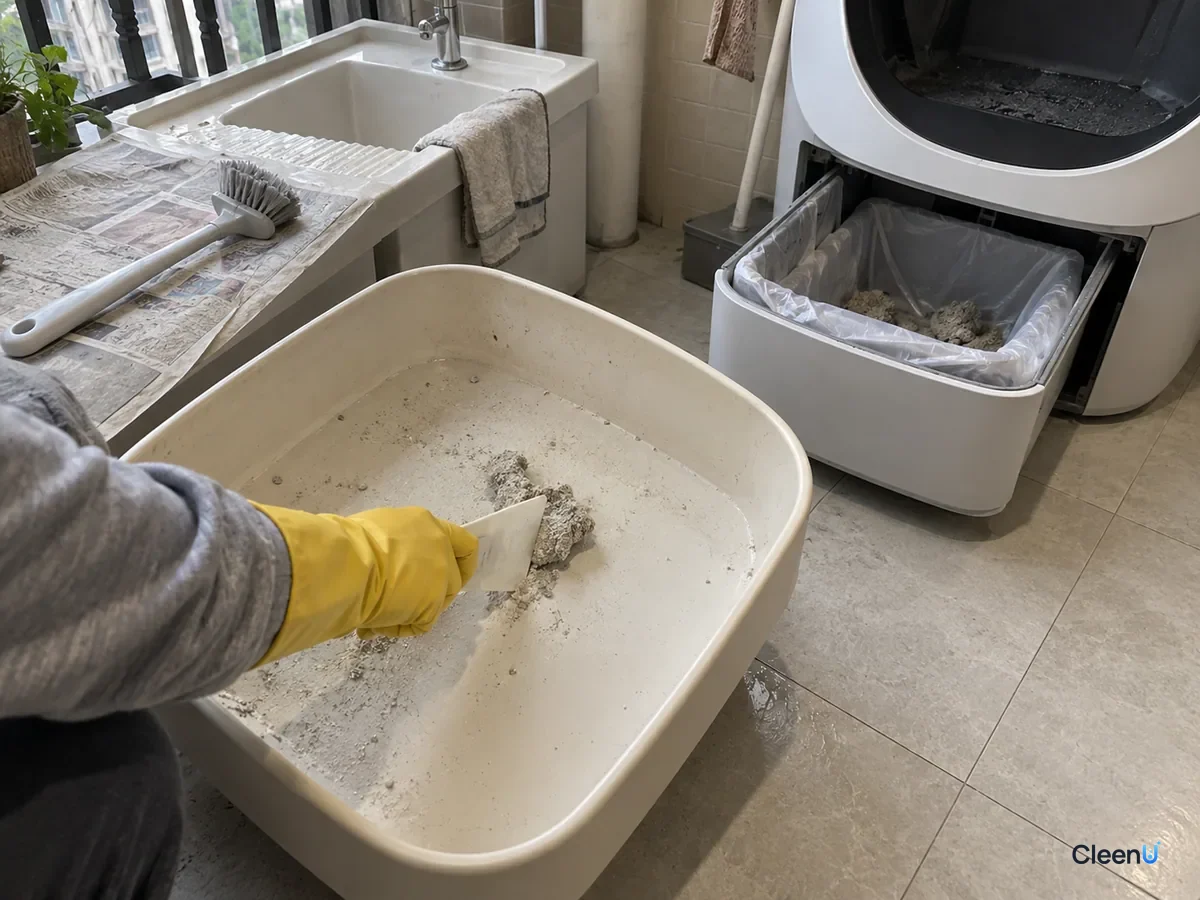
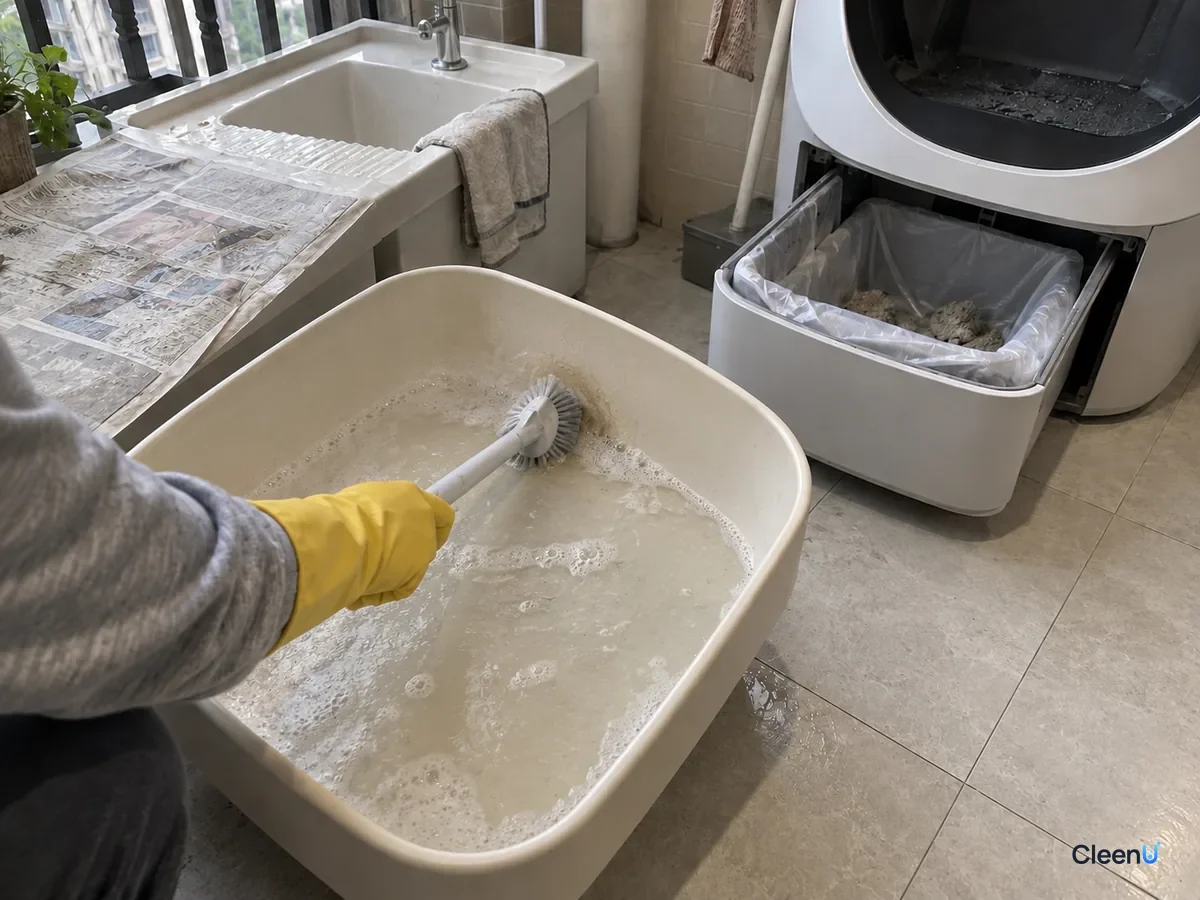
The steps people skip are rinsing and drying. Leftover cleaner smell makes cats hesitate, and a damp box makes new litter stick. A few extra minutes on each saves you dealing with a cat that won't use the box. When you're done, take off the gloves and wash your hands with soap and water; the CDC notes you should wash up even after just scooping.
How to deep clean a robot litter box
A self-cleaning or robot litter box handles daily scooping, but it still needs cleaning itself. Most have a drum or tray that holds the litter, sensors that detect the cat and litter level (infrared, weight, or others, depending on the brand), a waste drawer that collects clumps, and a motor and circuit board in the base.
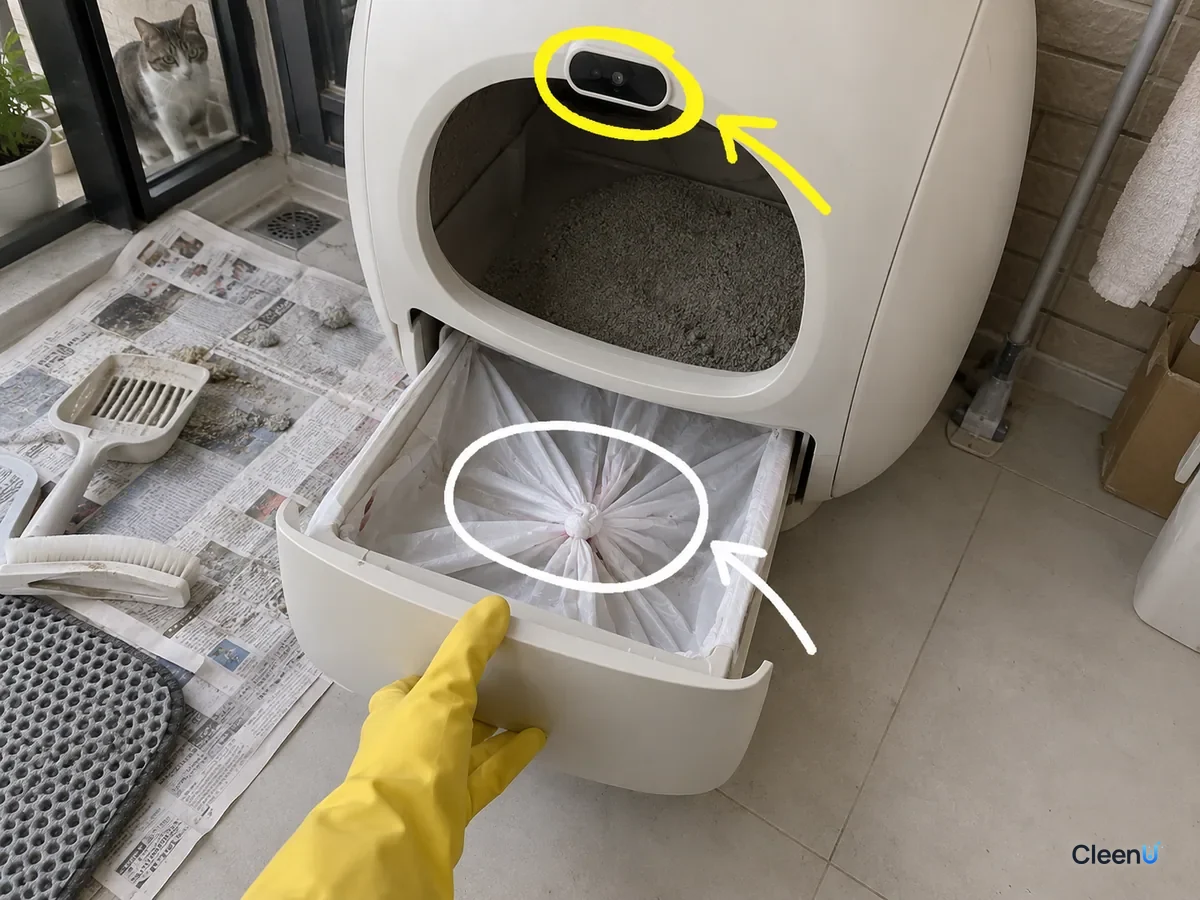
Three spots need attention. The waste drawer: a full bag or a loose tie lets odor escape straight from the machine, so change bags when prompted and wipe the drawer each time. The sensors: litter dust and kicked-up granules on the sensor windows can make the machine misread whether a cat is inside or how much litter is left, so wipe them with a dry or well-wrung cloth rather than spraying liquid at them. The drum or liner: at each full change, remove it as the manual describes and clean it like a plastic box; if it has a non-stick coating, don't scrape it with a stiff brush or scraper.
Some models don't separate, or the manual specifies its own cleaning method. In that case, the manual wins. The base that houses the motor and electronics should never be soaked or rinsed; wipe the outside with a well-wrung cloth.
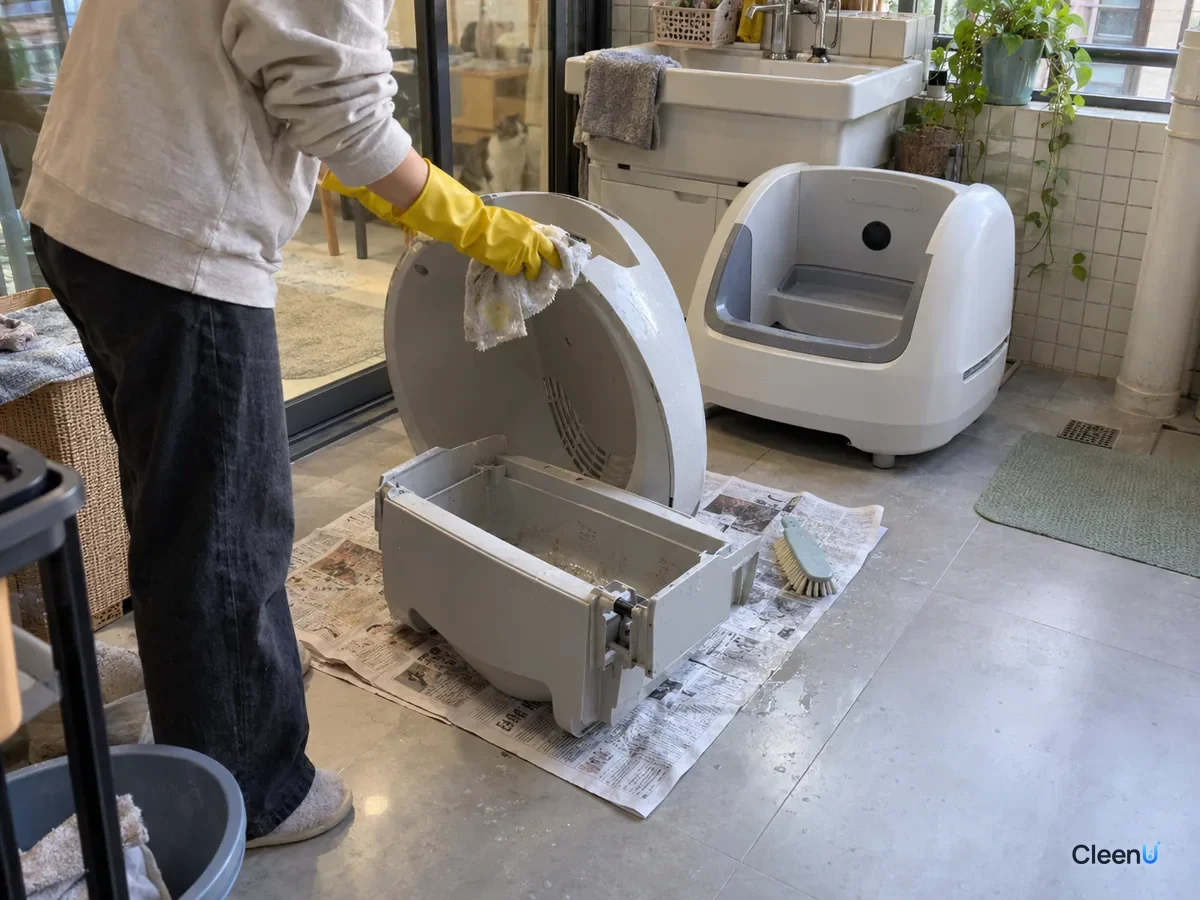
Check around the machine, too: tracked litter and urine splashes on the housing. The outside and nearby floor can be misted with a litter box odor eliminator and wiped dry; keep spray off the electronics.
Why to skip scented and phenol-based cleaners
Start with scent. The ASPCA's guidance on litter box problems is direct: don't wash the box with scented cleaners, or your cat may develop an aversion to it. The Cornell Feline Health Center likewise recommends a mild detergent, a thorough dry before refilling, and unscented litter. Cats identify their bathroom by smell. A box that suddenly smells of strong lemon, pine, or flowers says "clean" to you and "unfamiliar" to your cat. It's the most common reason a cat refuses a freshly washed box.
Then phenols. The Merck Veterinary Manual explains that cats lack enough of a liver enzyme, UDP-glucuronosyltransferase, to process phenolic compounds normally, which makes phenolic disinfectants more toxic to cats; it says they're best avoided in feline environments, including homes. Pet Poison Helpline notes that phenols show up in some toilet bowl cleaners and multi-surface sprays. When you read a label, ingredients like phenol, cresol, or chloroxylenol (PCMX), a phenol derivative, mean that product isn't for the litter box.
Essential oils are the third concern. For related metabolic reasons, cats are more sensitive to some of them. Pet Poison Helpline's list of oils linked to cat poisonings includes pine, citrus (d-limonene), tea tree, and eucalyptus, with risk rising at higher concentrations and with direct contact or licking. Many pine- or citrus-scented cleaners get their smell from those oils, which isn't a trade worth making for a box your cat steps and digs in every day.
So the bar is simple: unscented, no phenols or essential oils, mild, and easy to rinse. Plain water and a good brush work too; the ASPCA lists water alone as an option.
How to clean a litter box when pregnant or immunocompromised
Toxoplasmosis is the reason litter boxes worry expecting parents. The CDC's public guidance boils down to a few points:
- Change the litter daily. The parasite shed in cat feces takes 1 to 5 days to become infectious, so daily cleaning removes it before that.
- If you're pregnant or immunocompromised, have someone else clean the box whenever possible. If you must do it, wear disposable gloves and wash your hands with soap and water afterward.
- Keep cats indoors, and feed commercial food or well-cooked food, never raw or undercooked meat.
- Don't adopt or handle stray cats, especially kittens, and don't get a new cat while pregnant or immunocompromised.
- Keep litter boxes away from food prep areas, and don't wash them in the kitchen.
This is general public health guidance; talk to your doctor about your own situation. A cleaner's job here is getting the box clean, not killing anything. What lowers the risk is cleaning daily, gloves, handwashing, and letting someone else do it.
Cat won't use the box after cleaning? Check these in order
- Leftover cleaner smell. The most common cause: a scented product, or not enough rinsing. Rinse again with plain water, dry it, and switch to unscented next time.
- Litter went into a damp box. Wet, stuck litter feels wrong underfoot. Dump it, dry the box, refill.
- Too many changes at once. New box, new litter, and a new spot on the same day can leave a cat unsure where its bathroom is. Change one thing at a time and mix in some old litter.
- Litter too shallow or too deep. Too thin to dig in, or deep enough to sink. Go back to about 1 to 2 inches.
- A health problem. Frequent trips, small amounts, blood in the urine, or crying while peeing have nothing to do with cleaning; see your vet. A male cat straining with little or no urine is an emergency.
How to tell it's clean
At home, use four checks: the bottom and corners don't feel slippery, a damp white paper towel wiped in the corners comes away clean, rinse water runs without suds, and the dry box smells of neither urine nor cleaner. If all four pass, refill it.
Each check points to something specific. A slippery feel means a film of urine scale and body oils is still on the wall where the brush didn't reach. A yellow mark on the paper towel means urine pigment and scale are still in the corners. Suds mean cleaner hasn't been rinsed off, and it will dry into a thin film that makes litter stick next time. And any smell matters: a cat's nose is far more sensitive than yours, so a scent you can barely pick up is obvious to your cat.
On an older plastic box, the scratches are the hardest part to judge. Hold a flashlight low across the bottom so the light skims the surface; any scratch that looks yellow or dark is a spot the brush missed, so go over it again with a small brush along the line of the scratch. If it stays yellow after scrubbing and still smells once dry, urine has worked into the plastic surface and no amount of washing will get it out. That's when it's time for a new box.
Choosing a dedicated litter box product
The same rules apply: fragrance-free, no phenols or essential oils, and easy to rinse. On top of that, a dedicated litter box product handles what a brush leaves behind, the organic residue and odor molecules sitting in the fine texture of the walls.
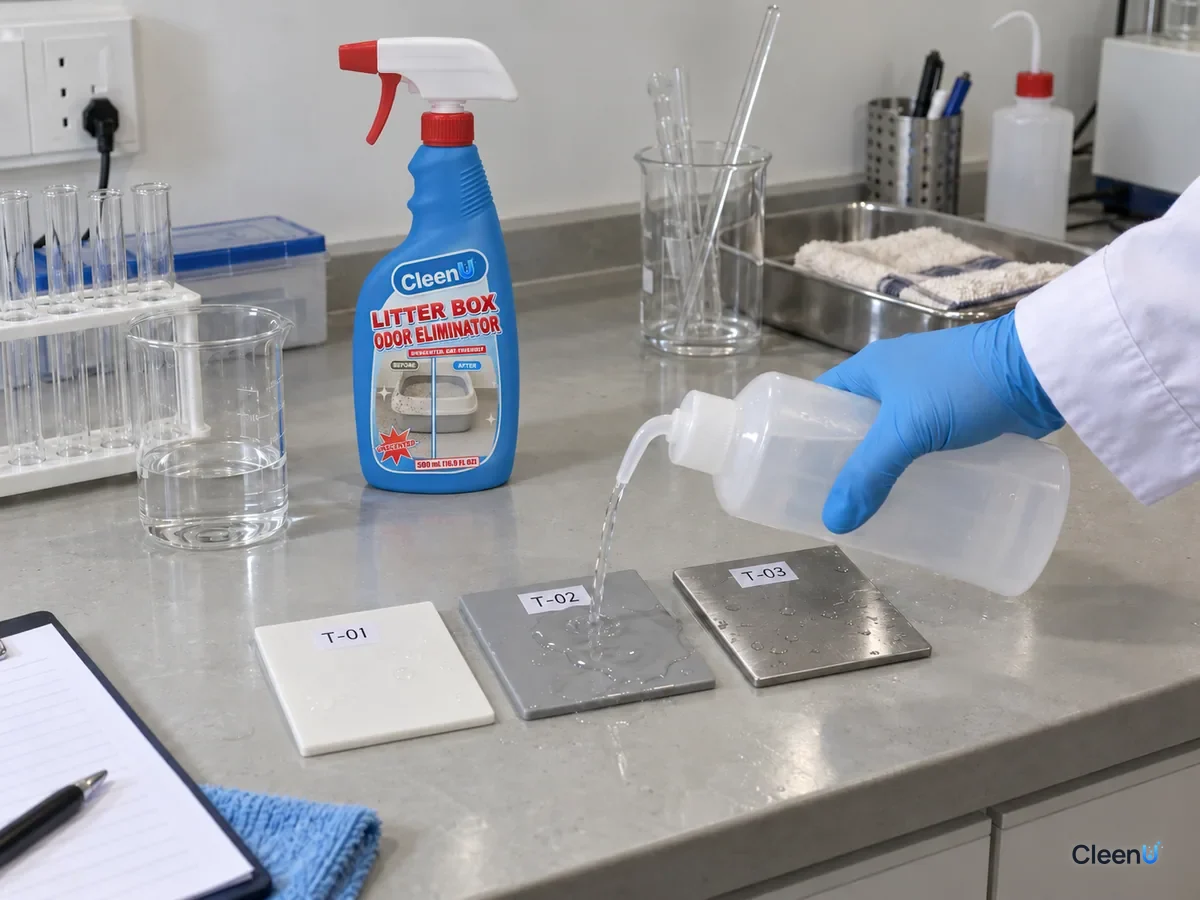
Take CleenU Litter Box Odor Eliminator as an example. It's a fragrance-free, ready-to-use fine mist: enzymes break down the organic residue that urine and stool leave on the walls, while cyclodextrin and zinc ricinoleate trap the odor molecules that remain, instead of covering them with scent. At each full change, coat the inside of the empty box, wait 5 minutes, rinse, and dry; after daily scooping, mist the litter surface 3 to 5 times. Don't spray toward your cat, don't combine it with chlorine bleach, don't soak the litter, and don't use it in place of regular litter changes. On a self-cleaning box, use it only on the litter and removable walls, never on the electronics.
To treat odor and organic residue on the walls at each full litter change, take a look at Litter Box Odor Eliminator.
For more cleaning topics, browse our pet home cleaning hub.
Stop if any of these happen
If a sharp smell stings your eyes or throat while cleaning, ventilate and leave the area, check whether bleach met another cleaner or urine residue, and get medical help if symptoms continue. If your cat avoids the box after cleaning, rinse and dry it again and watch for frequent trips, small amounts, or blood in the urine; if you see any, see your vet. A male cat straining with little or no urine needs an emergency vet. If a self-cleaning box shows errors, makes odd noises, or got water inside, unplug it and contact the manufacturer.
Cleaning a litter box: common questions
Can you clean a litter box with dish soap?
Yes, if it's unscented and mild. Add a small amount to warm water, scrub, and rinse until there are no suds or slippery feel. Scented dish soap tends to linger, and a cat may avoid a box that wasn't rinsed well.
Can you clean a litter box with bleach?
Not for routine cleaning. A scrubbed, rinsed box doesn't need it. If your vet recommends disinfecting, scrub off the scale and rinse first, dilute exactly as the label and vet direct, never mix it with other cleaners or urine residue, then rinse and dry until no smell remains.
How do you clean a litter box when pregnant?
Have someone else do it whenever possible; that's the CDC's advice for pregnant and immunocompromised people. If you must, wear disposable gloves, wash your hands with soap and water afterward, and ask your doctor about anything else you should do.
How often should you change all the cat litter?
The ASPCA recommends weekly. Many single-cat homes with clumping litter go two to four weeks, and plant or pine litters often one to two. Change early if the litter yellows, crumbles, or smells soon after scooping.
Can you clean a litter box with vinegar?
It isn't a good main cleaner. The sour smell can bother cats and lingers if not rinsed off, while warm water, a mild unscented cleaner, and a brush remove scale fine.
When should you replace a litter box?
When it still smells after a full scrub and dry, has scratches deep enough to catch a fingernail, carries a yellow film that won't scrub off, or is cracked or warped.
Does a stainless steel litter box need less cleaning?
It needs the same schedule. Steel doesn't absorb odor or scratch easily, but scale and waste still stick. Rinse and dry it after washing, and don't leave it soaking in bleach, which can cause rust spots.
How long after washing can I put litter back in?
As soon as it's completely dry, meaning nothing feels damp and no water sits in the corners. Litter in a damp box sticks and gets wet early.
My cat won't use the new litter box. What should I do?
Mix some old litter into the new, put it in the same spot, and don't change the litter type at the same time. If the new box smells of plastic, wash it with warm water and unscented cleaner and dry it first.
Do I need to wash my hands after cleaning the litter box?
Yes. Take off your gloves and wash with soap and water; the CDC recommends handwashing even after just scooping.
Sources: ASPCA, "Litter Box Problems"; Cornell Feline Health Center, "Feline Behavior Problems: House Soiling"; CDC, "Preventing Toxoplasmosis," "People at Increased Risk for Toxoplasmosis," and "Cats | Healthy Pets, Healthy People"; Merck Veterinary Manual, "Phenols and Related Compounds as Antiseptics and Disinfectants for Use With Animals"; Pet Poison Helpline, "Essential Oils and Cats" and "Conquer COVID-19; Spare Pets." Accessed October 2026.
Deep cleaning a litter box means, on top of daily scooping, dumping all the litter every 1 to 4 weeks depending on the type and scrubbing the empty box: scrape off stuck clumps with plastic, scrub the bottom, corners, and rim with warm water and a mild unscented cleaner, rinse until there are no suds or slippery feel, and dry completely before adding 1 to 2 inches of fresh litter. Skip scented, phenol-based, and essential-oil cleaners, and save bleach for when your vet calls for it. Unplug self-cleaning boxes and keep their electronics dry. Replace plastic boxes that hold odor or have deep scratches. If you're pregnant or immunocompromised, let someone else do it, and always wash your hands afterward.