
Troubleshooting
Robot Vacuum Ran Over Dog Poop or Cat Vomit? Cleanup Steps and Settings That Prevent It
Direct answer
Pause it and pick it up right away. Don't let it keep going or return to the dock to self-clean. Wash the pads, brush roll, side brush and bin separately, scrub the wheels in place, and only wipe sensors. Clear the floor, treat it with an enzyme cleaner, and disinfect separately if needed.
What you see
Tire tracks and looping swirl marks across the living room tile. The robot is parked in a corner, or already back on the dock washing its pads. The house smells, and the dog is watching from behind the gate.
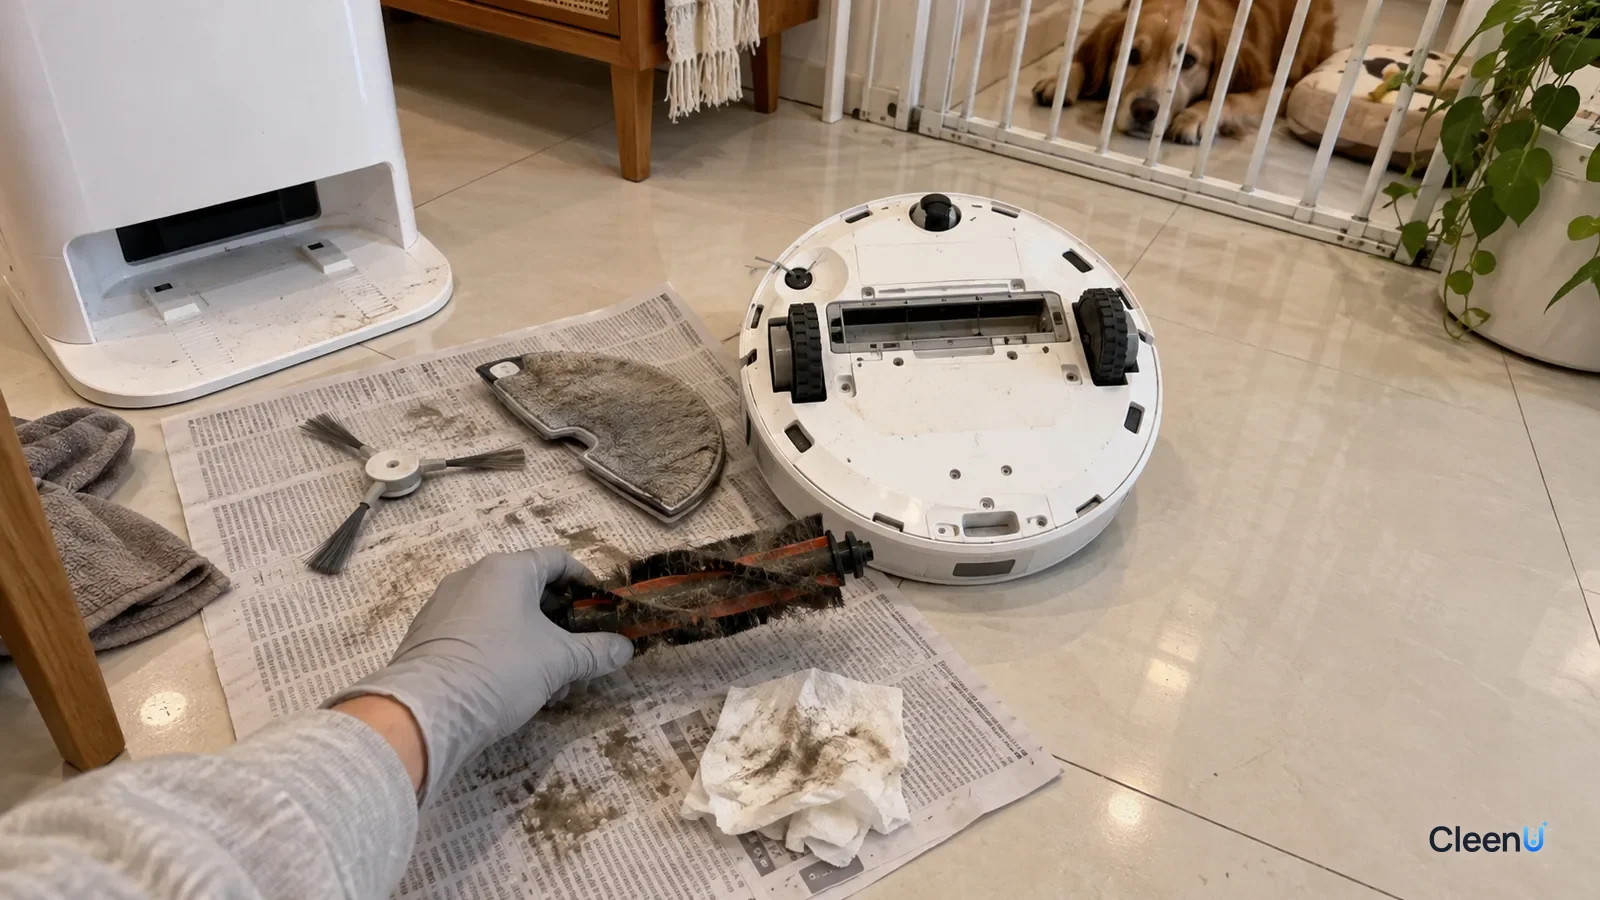
If your robot vacuum ran over dog poop, the first job isn't finding a cleaner. It's stopping the spread. Pause the robot, lift it onto old newspaper, and cancel the rest of today's scheduled runs. Every extra lap spreads it farther, and once it docks, the dock needs cleaning too.
Then get pets and kids out, clear the solids and spray an enzyme cleaner on the floor, and take the robot apart while it sits. Sort parts into "washable" and "wipe only," do the dock last, and treat disinfection as a separate, optional step, never combined with or right after the enzyme cleaner.
The first minute: stop it, isolate it, don't send it home
Tapping "return to dock" or letting the robot finish its route both make things worse. It won't stop because it's dirty; it keeps printing the mess into every room it hasn't reached.
Docks are built for dust, hair and ordinary dirty water. Send the robot back and the mess goes into the wash tray, filter, dirty water tank, drain line and dust bag. Heated drying is worse still: heat sets proteins (textbook biochemistry), so baked-on residue is usually harder to remove.
- Press pause, set the robot upside down on newspaper, switch it off if it has a power switch, and pause today's schedule.
- If it's already washing its pads, stop the cycle and lift it off the dock.
- Keep pets and kids out. Pet Poison Helpline advises keeping pets out while you clean and putting used wipes in a lidded trash can.
- Open a window, put on disposable gloves, and photograph the underside and dock for support.
If it was cat poop, the CDC's toxoplasmosis guidance notes the parasite in cat feces doesn't become infectious until 1 to 5 days after it's passed. If you're pregnant or immunocompromised, have someone else clean up if possible; otherwise wear disposable gloves and wash with soap and water after. Ask your doctor about your situation.
Where the mess goes: from brush roll to dirty water tank
The suction path. The side brush sweeps debris to the center and the brush roll flicks it toward the bin. Being semi-solid, most poop smears onto the brush roll, packs into its end caps and coats the suction inlet. A coated side brush draws an arc every rotation: those are the swirl marks.
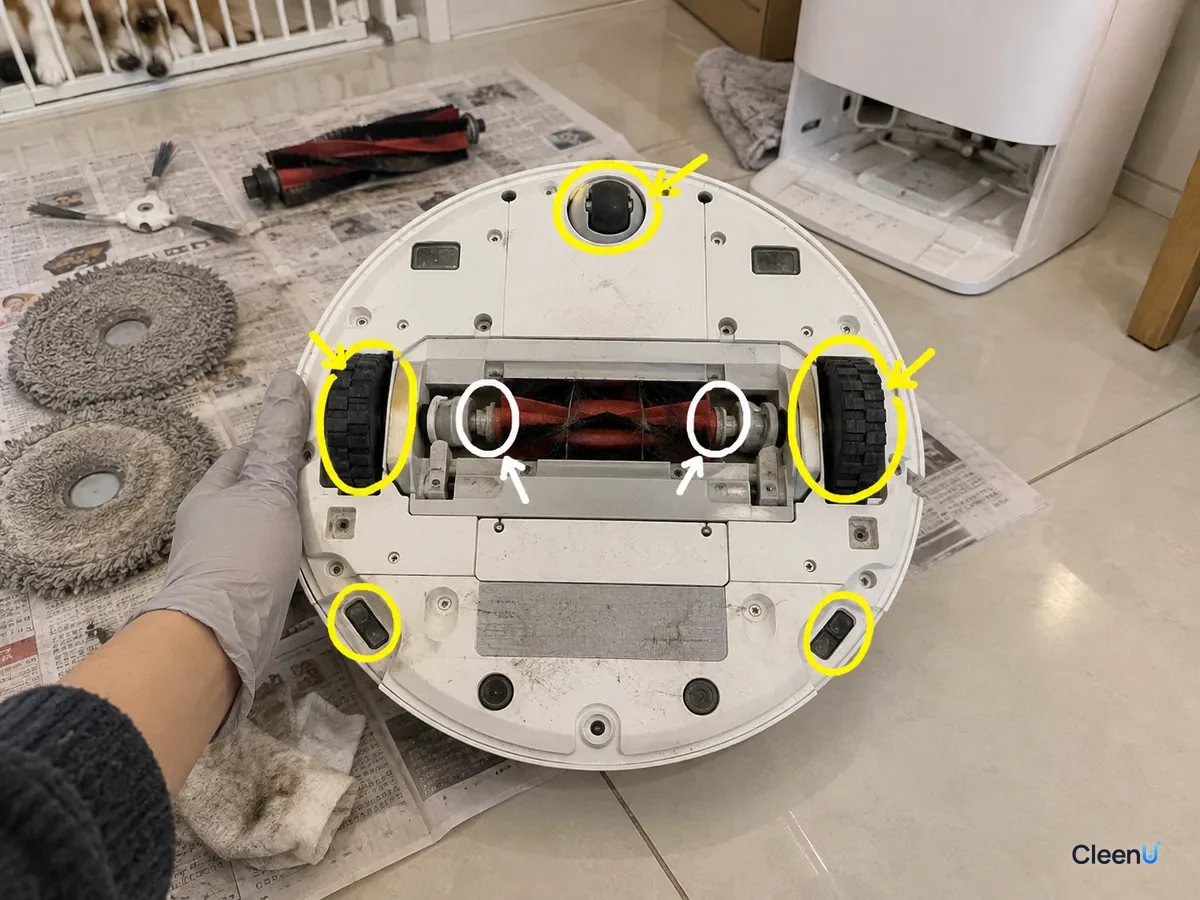
The drive system. Wheel treads fill and stamp a print every turn, the caster's tight axle traps debris, and the low cliff sensors get splattered.
The mopping water path. A wet pad mixes poop with water and spreads it thin. At the dock, pads are rinsed in the wash tray, dirty water goes to the tank, and the tray filter and drain catch solids.
The bumper, obstacle-sensor window and charging contacts get little on them, but they're electronics and need a different approach.
Why it ends up everywhere: the physics of poop and vomit
Pet feces are mostly water. The solids include gut bacteria, undigested fiber, fat and intestinal mucus. The working part of that mucus is mucin, a family of glycoproteins that makes stool slick and sticky at once: it clings to rubber and plastic yet stretches into a thin film. Semi-solids like this are typically shear-thinning. At rest they act like soft clay; scraped quickly, they get runnier and spread, and a spinning brush roll supplies exactly that shear. With mopping on, the pad spreads the diluted mess into a film that dries as faint brown streaks and keeps smelling, because its proteins, fats and bacteria keep breaking down into sulfur- and nitrogen-containing odor compounds.
Vomit is wetter and spreads faster, and the hair in cat hairballs wraps around the brush roll and end caps. Stomach contents are acidic, so vomit left on marble or other natural stone may leave a dull etched spot. And time matters: fresh, it wipes up easily; hours later, it has dried into treads and fibers.
How one small pile ends up all over the house
- The side brush sweeps it inward, drawing arcs
- The brush roll shears it thin into fins and end caps
- Wheel treads fill and print every rotation
- A wet pad spreads it into a film
- The dock takes it into the tray and tank; heated drying hardens it
Figure out how far it got, then decide what to take apart
To clean a robot vacuum that ran over dog poop, you rarely need to strip it completely. Work down this list.
Six questions that tell you which parts need cleaning
-
Step 1 Did the robot dock and wash its pads or auto-empty?
- Yes
- The dock is contaminated. Hand-wash the wash tray, scraper, filter and dirty water tank, replace the dust bag, and run one plain-water pad-wash cycle to flush the lines.
- No
- Go to the next check
-
Step 2 Was mopping on, and can you see or smell anything on the pads?
- Yes
- Remove and bag the pads first. Rinse lightly soiled pads in cold water and wash per the manual; replace heavily soiled ones or any that still smell.
- No
- Go to the next check
-
Step 3 Is there residue or tangled hair on the brush roll or side brush?
- Yes
- Remove both brushes and pull the end caps off the brush roll. Scrub the brush body with warm water and dish soap; wipe the end caps, don't soak them.
- No
- Go to the next check
-
Step 4 Is there residue in the wheel treads or front caster?
- Yes
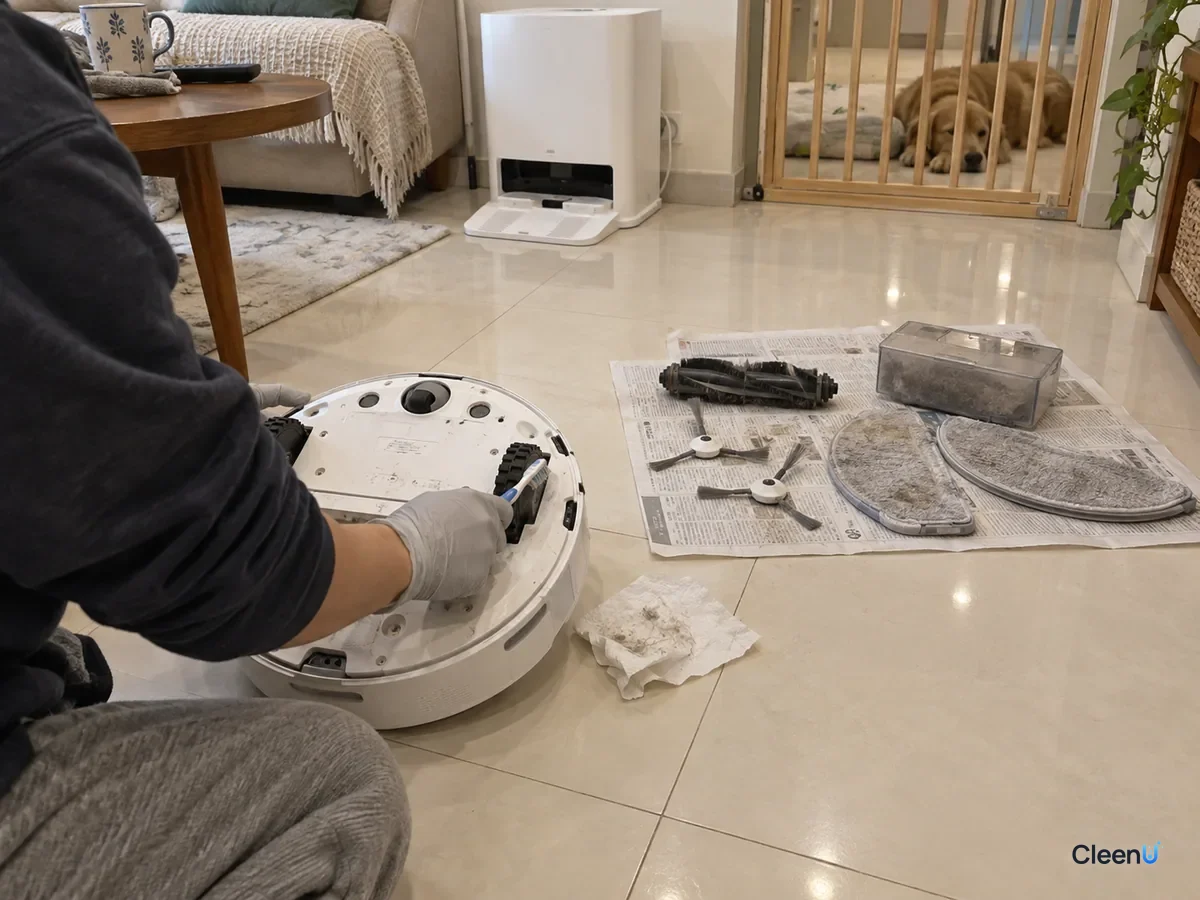
- With the robot upside down, scrub the tread with an old toothbrush, wiping with a wrung-out cloth as you rotate the wheel. Pop out the caster if it's removable and wash it separately.
- No
- Go to the next check
-
Step 5 Did anything get into the bin, filter or suction inlet?
- Yes
- Rinse the bin only if the manual allows and dry it fully. Replace the filter if you're unsure it's washable or it's heavily soiled. Wipe the inlet with a damp cloth.
- No
- Go to the next check
-
Step 6 Did anything reach the underside, sensor windows or charging contacts?
- Yes
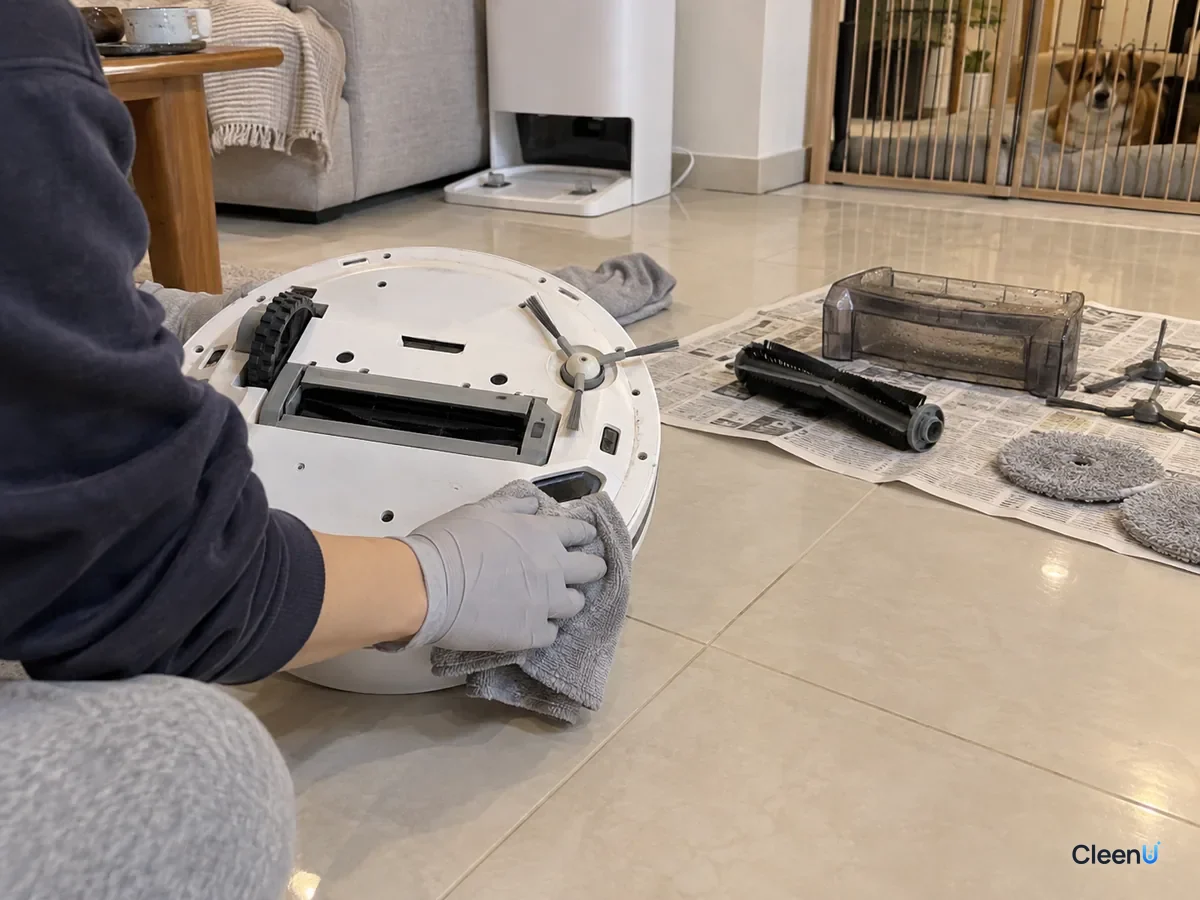
- Wipe only, with a soft cloth wrung out until it doesn't drip, then dry with microfiber. No rinsing, no spraying.
- No
- The robot is done. Move on to the floor and the dock.
Remove the wettest, dirtiest, easiest parts first, then the delicate ones: pads, then brushes (which exposes the wheels and sensors), then the bin, then wipe the wheels, sensors and body. Keep two piles on the newspaper: "to wash" and "wipe only."
What you can wash and what you should only wipe
Rinse the whole robot and the mess comes off, along with its working life. Only plastic and fabric parts take water; anything with a motor, board, bearing or sensor gets wiped.
How to handle common parts (follow your manual)
- Mop pads
- Rinse in cold water, wash per the manual, dry fully; replace if heavily soiled
- Brush roll body
- With end caps off, scrub with warm water and dish soap; dry before reinstalling
- Brush roll end caps
- Wipe, don't soak; they may contain bearings
- Side brush
- Scrub if removable; replace if bent, discolored or smelly
- Dust bin
- Rinse only if the manual allows, then dry fully; wipe bins with electronics
- Filter
- Follow the manual; replace if not washable or heavily soiled
- Drive wheels and caster
- Scrub in place, wipe with a damp cloth; no rinsing
- Sensor windows, charging contacts
- Wipe gently with a wrung-out soft cloth, then dry
- Dock wash tray, scraper, dirty water tank
- Remove, hand-wash, rinse and air-dry
Why electronics only get wiped. Motors and boards are sealed against splashes, not rinsing. Water that seeps in may seem fine, then show up days later as an error code or a new noise, and end-cap bearings can rust from the water and salts in feces.
Go easy on sensor windows. They're clear plastic or glass, often coated. Rough paper towels or alcohol and solvent wipes can scratch or haze them, making the robot worse at spotting obstacles and the next mess. Use barely damp microfiber, then dry.
Leave the wheels on and dry everything first. Most drive wheels are single modules with a motor and spring; if the manual doesn't call them user-removable, don't unscrew them. Let washed parts dry completely, usually overnight; reassembled damp, they start smelling again within a day or two.
What to clean with: clean first, disinfect only if needed
The mess is organic: proteins, mucin, fat, fiber and bacteria. Remove it first, then decide whether to disinfect.
Cleaning is surfactant plus scrubbing. Warm water, dish soap and an old toothbrush do most of the work: the surfactant loosens fats and mucus, the brush scrapes, running water carries it away. Rinse the bulk off with room-temperature water first; very hot water can make some protein soils harder to lift.
Why cleaning comes first. The CDC's disinfection guidelines list inactivation by organic matter as a drawback of chlorine disinfectants. Spray a coated part and most of the active ingredient is spent on the mess. The order is clean, rinse, dry, then disinfect.
When to disinfect. The CDC's Healthy Pets guidance says pet urine, feces and vomit should be cleaned up promptly and the area then disinfected. It's most worth it with a crawling baby or someone immunocompromised at home, a pet with diarrhea, or cat poop: use a hard-surface disinfectant on the cleaned floor per its label, then wipe with water. For robot parts, check the manual; some say not to use corrosive cleaners or disinfectants on the brush roll.
Keep enzyme cleaners and bleach apart. Bleach disrupts protein structure, and enzymes are proteins, so using them together or back to back generally knocks out the enzymes. Bleach meeting urine can also form irritating chloramine gas; see Can a robot mop clean up pet urine? On any spot, use one or the other, separately. Don't stack them.
Don't add anything to the robot's tanks. Enzyme cleaner, disinfectant or bleach poured into the clean water tank or dosing compartment to "sanitize the lines" can foam, attack seals and leave residue. See Can you put vinegar or bleach in a robot mop tank?
Cleaning the floor: lift, wipe, treat, dry
Lift the solids. Use thick paper towels or a small scraper to lift formed stool into a sealable bag, working from the outer edge inward so you don't push it wider.
Wipe the film. Follow the tracks with disposable wipes, turning to a clean side each pass, and toothbrush the grout and seams, where odor hides.
Treat the residue. A floor that looks clean often still carries an invisible organic film, and that film is what smells. Pet enzyme cleaners typically pair protease, lipase and amylase with nonionic surfactants: the enzymes break down protein, fat and starch residue, and the surfactants carry the fragments away. Spray an area slightly larger than the mark, saturate the seams, let it sit 10 to 15 minutes, blot dry with a clean cloth and let it air-dry. Pick a fragrance-free one, so once it's dry, what you smell is the floor itself.
- Tile and luxury vinyl plank: follow the steps, with extra attention to grout.
- Sealed hardwood and laminate: don't let liquid pool in seams. This enzyme cleaner isn't for unsealed wood.
- Marble and other natural stone: wipe vomit up fast and test the cleaner in a hidden spot.
- Carpet and rugs: blot, never rub; then saturate, let it sit and blot dry. Send wool and silk rugs to a professional.
If urine was involved too, see Can a robot mop clean up pet urine? for the by-hand routine.
If the dock got contaminated
Empty the dirty water tank into the toilet, scrub it with warm soapy water and air-dry it open. Remove the wash tray per your manual, scrub the scraper and filter, clear the drain, and replace the dust bag. Once everything is dry, run one plain-water pad-wash cycle to flush the lines and empty the tank again. If the tray still smells the next day, the filter or drain likely needs another scrub; see Black slime in the robot vacuum base station tray.
How to tell it's really clean
- White-tissue swab. Rub a damp white tissue along the brush roll fin bases, end caps, wheel treads, caster axle and suction inlet. Yellow or brown transfer marks a missed spot.
- Paper roll test. Roll the wheels across white paper and look for tread prints.
- Sniff when dry. Many odors only show up once parts dry. That's why fragrance-free products suit pet homes: with added fragrance, you can't tell whether what's underneath is clean.
- Short test run. Vacuum one small room, wipe the floor with a white tissue, then turn mopping back on. Sniff the robot and dock the next morning; missed spots usually smell a day later.
Poop, vomit or urine: where to focus
Match your situation: what to focus on and how to prevent it
| Situation | What you'll see | Focus on | Prevent it next time |
|---|---|---|---|
| Formed stool, vacuum only | A few tracks | Brushes, wheels, inlet | Floor check; avoidance on |
| Soft stool, mopping on | Large smeared area | Replace pads; clean everything | Pause schedules while your pet is sick |
| Vomit with hairballs | Wet patch, hair on the brush | Cut hair away, clean end caps | No runs right after meals |
| Urine got mopped | Smear with urine odor | Treat floor by hand; wash or replace pads | No-go zone around pee pads |
| Robot docked and washed pads | Odor in tray and tank | Hand-wash dock parts; plain-water flush | Check pet areas before it docks |
| Dock auto-emptied | Odor at bag and port | Replace the bag; wipe the port | Turn off auto-empty near pet areas |
| Ran onto a rug | Residue at the pile base | Blot, enzyme cleaner, blot dry | Rugs as no-go zones |
Still smells? Check in this order
- Pads not fully clean or dry. If they still smell, replace them.
- Brush roll end caps. Pull the caps and tweeze out hidden hair.
- The bottom of the wheel tread. Rotate and scrub all the way around.
- The dock filter and drain. The tray got washed, the filter didn't.
- The bin filter. Fine particles pack the pleats; replace it if it isn't washable.
- Grout, seams and baseboards. Spray enzyme cleaner again, let it sit, blot dry.
- The internal air path. If the smell clearly comes from inside the robot, contact support.
What to do yourself and what to hand to support
Clean or replace parts your manual lists as user-removable. Leave anything that needs screws or opening the housing. For error codes, new noises, suspected liquid inside or residue deep in the air path, send your photos to support and ask about cleaning or replacement parts.
Run the numbers. Pads, side brushes, filters and dust bags are consumables; replacing soiled ones beats washing them over and over. Spend your time on the bin, wash tray and dirty tank. Contaminated inside and quoted near the price of a new robot? Decide on cost.
Can obstacle avoidance prevent this?
Many robots advertise pet waste avoidance. It helps, but don't rely on it alone. Most use a camera with software that classifies what's ahead, a structured-light or line-laser sensor that measures height and shape, or both. Hence the limits: vomit, urine and loose stool are nearly flat, so distance sensors struggle to separate them from the floor; dark waste on a dark rug has little contrast, and cameras do worse with the lights off; and the side brush and pads reach wider than the body, so a tight pass can still clip the edge.
Treat avoidance as insurance; settings and routines do the real work:
- Turn on obstacle avoidance and any pet mode.
- Draw no-go zones around the crate, pee pads, litter box and bowls.
- Schedule runs for after the morning walk, while you're home, and scan the floor for 30 seconds first. When you're out, run only rooms the pet can't reach.
- Pause automatic runs when your pet is unwell. Make rugs a no-go zone or turn mopping off on carpet; see Robot mops and rugs.
Puppies in house-training haven't settled on a spot, so avoid unattended runs. Senior pets may not make it in time because of mobility issues or incontinence, so skip overnight runs. In shedding season, hairball vomiting rises, so don't schedule runs right after meals.
Sudden accidents, diarrhea or repeated vomiting can be a health or behavior signal, so see your vet first. Cornell's Feline Health Center says a cat vomiting more than once a week, or with lethargy, appetite loss or blood, should be checked. Cornell's Riney Canine Health Center advises calling a vet if a dog vomits blood or keeps vomiting past 24 hours. Cleaning only handles the aftermath. For everyday setup, see Robot mopping in a pet home.
What to buy: one product for the floor, one for everyday mopping
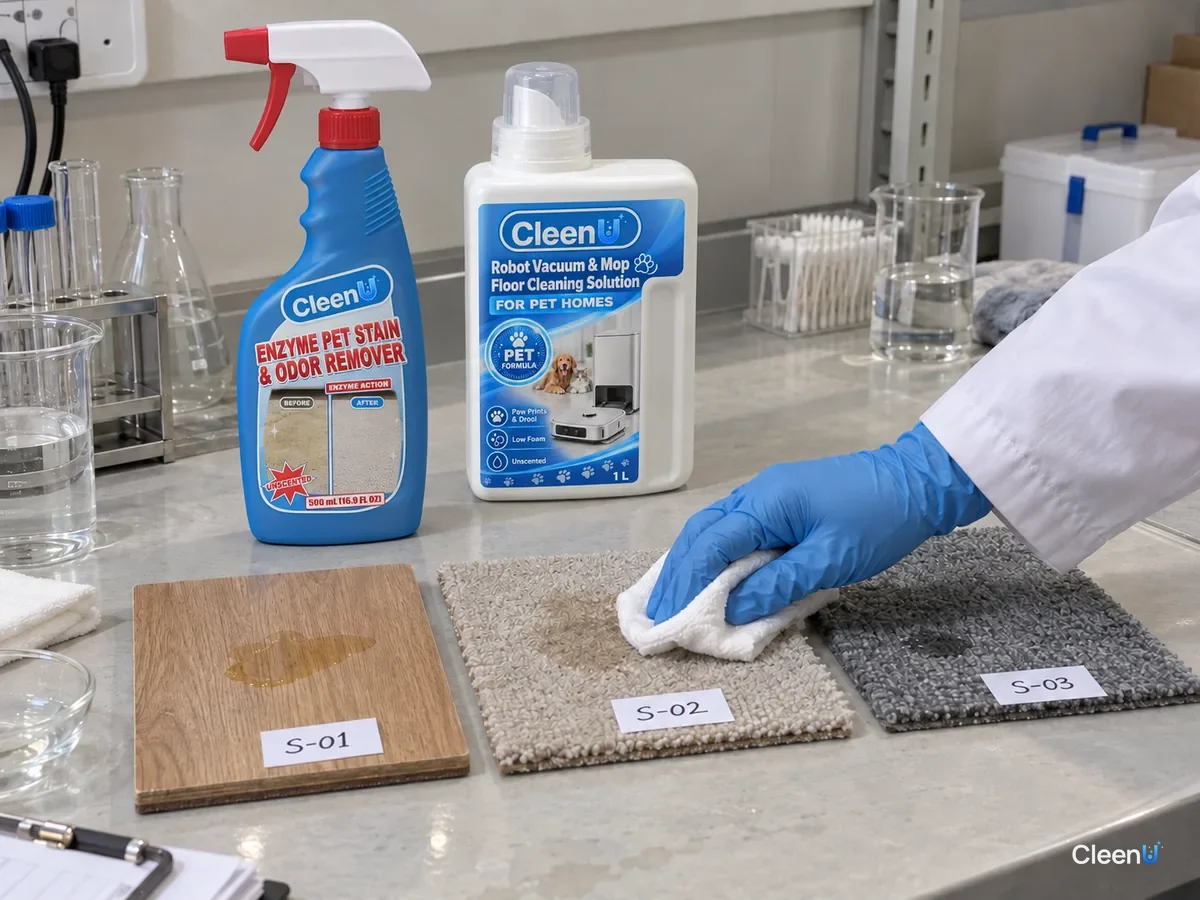
Taking CleenU as an example, use one product for the floor and one for everyday mopping. Floor residue and odor: Enzyme Pet Stain & Odor Remover. A ready-to-use multi-enzyme spray (pH 6.5–8.0, fragrance-free, 500 mL / 16.9 fl oz trigger bottle) for pet urine, vomit and drool stains on carpet, upholstery, mattresses, pet beds and hard floors such as tile and sealed wood. Not for wool, silk, leather, suede or unsealed wood, and not for use with, or right after, chlorine disinfectants.
For the residue and odor left on the floor, try our Enzyme Pet Stain & Odor Remover.
Everyday mopping: Robot Mop Cleaning Solution for Pet Homes. Once the floor and robot are clean, use it for routine mopping of paw prints, drool marks and pet odor. It's neutral (pH 6.5–7.5 concentrate): low-foam nonionic surfactants, a cyclodextrin-based odor neutralizer and a defoamer, with no wax, chlorine, particles, solvents, optical brighteners or added fragrance. Each bottle is 1 L (33.8 fl oz). Dilute about 1:50 to 1:100, usually 10 to 20 mL (about 0.3 to 0.7 fl oz) per fill, in the clean water tank or the dosing compartment your manual specifies. It isn't for letting the robot mop through urine or vomit, isn't for carpet, and shouldn't be mixed with other cleaners or disinfectants.
When you're back to everyday mopping, switch to our Robot Mop Cleaning Solution for Pet Homes.
This robot mop solution has been through foam, residue and water-path testing on most models from major robot mop and wet-dry vacuum brands. If your model's manual says otherwise, follow the manual. See Pet-home vs. regular robot mop cleaning solution and our pet home cleaning guide.
When to stop and hand it off to support, a doctor or your vet
If the robot throws an error, makes a new noise, smells burnt, may have water or waste inside, or keeps bumping into things after a sensor window got scratched, stop powering it on, take photos and contact support. If anyone develops a persistent cough or trouble breathing, or lasting stinging after cleaner touches skin or eyes, leave the area, rinse with water and get medical care. If your pet licked a wet floor or has ongoing diarrhea or vomiting, call your vet right away, or the ASPCA Animal Poison Control Center at (888) 426-4435 or Pet Poison Helpline at (855) 764-7661; both may charge a fee.
Robot vacuums vs. pet poop and vomit: common questions
How do you get dog poop out of a robot vacuum?
Pause it and pick it up before it docks. Remove the pads, brushes and bin, scrub the washable parts with warm water and dish soap, and dry them fully. Scrub the wheels in place; only wipe the sensors.
Does a robot vacuum pick up dog poop?
No. Robot vacuums are built for dust, hair and everyday dirt; running over poop spreads it and contaminates the brushes, wheels and dock. Pick up pet waste by hand.
Can robot vacuums detect dog poop?
They avoid some of it, not all of it. Flat messes like urine, vomit and loose stool, and dark waste on dark floors, are hard to detect, so no-go zones still matter.
The robot already docked and washed its pads. Is the dock ruined?
No, but clean it first. Hand-wash the wash tray, filter and dirty water tank, let them dry, replace the dust bag, and run one plain-water pad-wash cycle.
Should I wash the mop pads or replace them?
Wash lightly soiled pads and replace heavily soiled ones or any that still smell. Pads are consumables, and replacing them is faster.
Can I add disinfectant to the water tank to sanitize the lines?
Don't. Disinfectant, bleach and enzyme cleaners aren't made for a robot's water system and can foam or damage seals. A plain-water pad-wash cycle is enough.
Can I use an enzyme cleaner and bleach together?
No, and not back to back either. Bleach disrupts protein structure, which generally deactivates the enzymes. Disinfect separately after the area is clean and dry.
Which robot vacuum parts can I take off and clean myself?
Clean any part your manual lists as user-removable, usually the pads, brush roll, side brush, bin and filter. Don't remove screws or open the housing; hand that to support.
How do I keep this from happening again?
Turn on obstacle avoidance, set no-go zones around the crate, pee pads, litter box and bowls, run the robot while you're home after a quick floor check, and pause automatic runs while your pet is sick.
My robot ran through cat vomit. Is the cleanup different?
Same order: stop it, then take it apart. Cut away hairball hair wrapped on the brush roll and end caps, and wipe vomit off stone quickly.
Sources (accessed October 2026): CDC, "Preventing Toxoplasmosis" and "Cats | Healthy Pets, Healthy People"; CDC, "Chemical Disinfectants"; Pet Poison Helpline, tips for keeping pets safe while disinfecting; Cornell Feline Health Center, "Vomiting"; Cornell Riney Canine Health Center, "Vomiting"; ASPCA Animal Poison Control Center.
When a robot vacuum runs over dog poop or cat vomit, the first minute decides the size of the job: pause it, pick it up, keep it off the dock. Take off the wettest, dirtiest parts first, wash or replace the pads, brushes and bin, scrub the wheels in place, wipe sensors without rinsing, and dry everything before reassembly. Clear the floor and use an enzyme cleaner on the residue and odor; disinfect separately if you need to. Avoidance helps, but no-go zones, smart scheduling and a 30-second floor check prevent the next one.