
How-to
First Robot Mop Run After a Renovation: How to Deal With Construction Dust
Direct answer
Vacuum twice with a shop vac, damp-wipe once, and hand the floor to the robot only when it no longer leaves dust on your hand. Cement haze needs hand treatment. Construction dust is so fine that a robot mop would turn it into a white paste and clog its filter and pads.
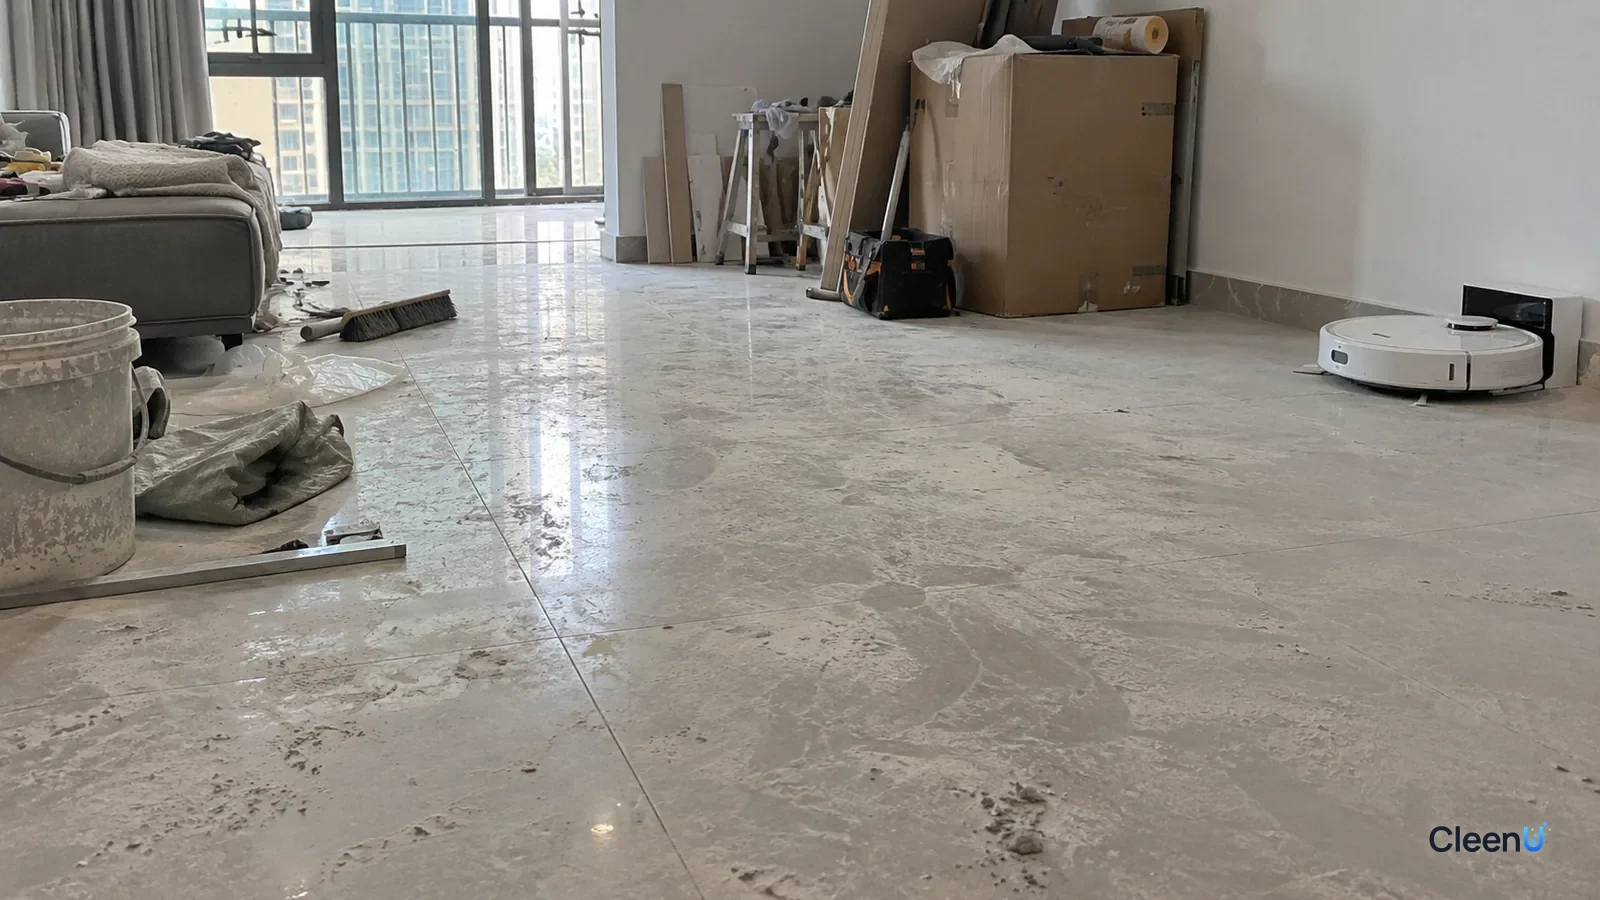
The renovation is done and the floor is covered in dust. The natural instinct is to let the new robot mop run a few passes. Then the floor dries to a white haze, the pads are caked with gray paste, the filter is packed with powder, suction drops and some robots throw a bin or filter error.
The robot isn't the problem. Construction dust is. It isn't ordinary household dust but extremely fine mineral powder that floats when dry, turns to slurry when wet and dries back into a white film. So the first cleanup after a renovation has to remove the bulk of the dust first, and only then should the robot take over routine care.
What construction dust is, and why it's so hard to mop
Construction dust comes mainly from a few materials.
Drywall joint compound and plaster: produced when walls are sanded. It's mostly calcium carbonate, talc and gypsum, fine enough to hang in the air for a long time before settling on floors, sills and cabinet tops.
Cement, thinset and grout dust: produced when tile is laid, cut and grouted. It contains silicates and calcium hydroxide, is mildly alkaline and slowly hardens once it gets wet.
Sawdust, cutting dust, paint spatter and adhesive smears from cabinet and flooring installation.
These dusts share a few traits that set the cleaning order.
They're extremely fine. A robot's side brush and suction pick up most particles, but fine powder quickly clogs the bin filter. Once suction drops, the rest gets dragged around by the mop pad.
They turn to mud with water. Joint compound and plaster become a paste when wet, so a mop pad smears a thin slurry across the floor that dries to haze and white marks.
They pack into gaps. Grout lines, plank seams and baseboard edges all collect dust, and wet mopping pulls it out of the gaps and smears it across the tile.
Cement dust can bond to the floor. Wet cement and grout residue can hydrate into a thin, hard cement haze that ordinary cleaning solution won't touch.
Why you shouldn't start with wet mopping
A robot mop uses little water per pad, covers a large area and passes back and forth. Facing a heavy load of fine dust, that causes three problems.
First, there's enough water to smear the dust but not enough to carry it away. The pad fills with slurry fast, and every pass after that makes the floor streakier.
Second, a self-cleaning dock's wash tray, dirty tank and lines fill with slurry that settles and can block the tray drain and filter.
Third, fine powder dries into the pad fibers, leaving pads stiff and gray and hard to wash clean.
So the order after a renovation is dry before wet, bulk before detail, and hands before robot.
What cleaning solution can and can't do here
Robot mop cleaning solution is made for everyday dust and greasy footprints. Low-foam nonionic surfactants wet the floor and help fine particles and oily soil lift off, disperse in the water and leave with the pad. In the last one or two mopping passes after a renovation, it helps carry away leftover fine dust so the floor feels cleaner.
It can't remove cement haze, grout residue or adhesive. Cement haze is a hardened mineral layer that needs a dedicated acidic haze remover applied by hand on tile, and adhesive needs its own remover. Those products never go in a robot's tank. Acids damage the robot's metal parts and seals, and they etch acid-sensitive floors such as marble and terrazzo. For what doesn't belong in the tank, see vinegar or bleach in a robot mop tank.
CleenU Robot Vacuum Cleaning Solution, for example, is a neutral, low-foam concentrate at pH 6.5 to 7.5 with low-foam nonionic surfactants and a defoamer, no wax, no chlorine and no particles. It dilutes at about 1:50 to 1:100; 10 to 20 mL per fill is usually enough. For the first few passes after a renovation, dose at the low end and focus on changing water and washing pads often.
Five steps before your robot mop's first post-renovation run
Clear debris and obvious dust piles
Pick up cardboard, wood scraps, tile shards and screws, and sweep dust piles in corners and under windows into bags. Don't let the robot vacuum large or sharp debris.
Caution:Tile shards, screws and wire ends can jam the side brush and scratch the floor. Remove them by hand.
Vacuum twice with a powerful vacuum
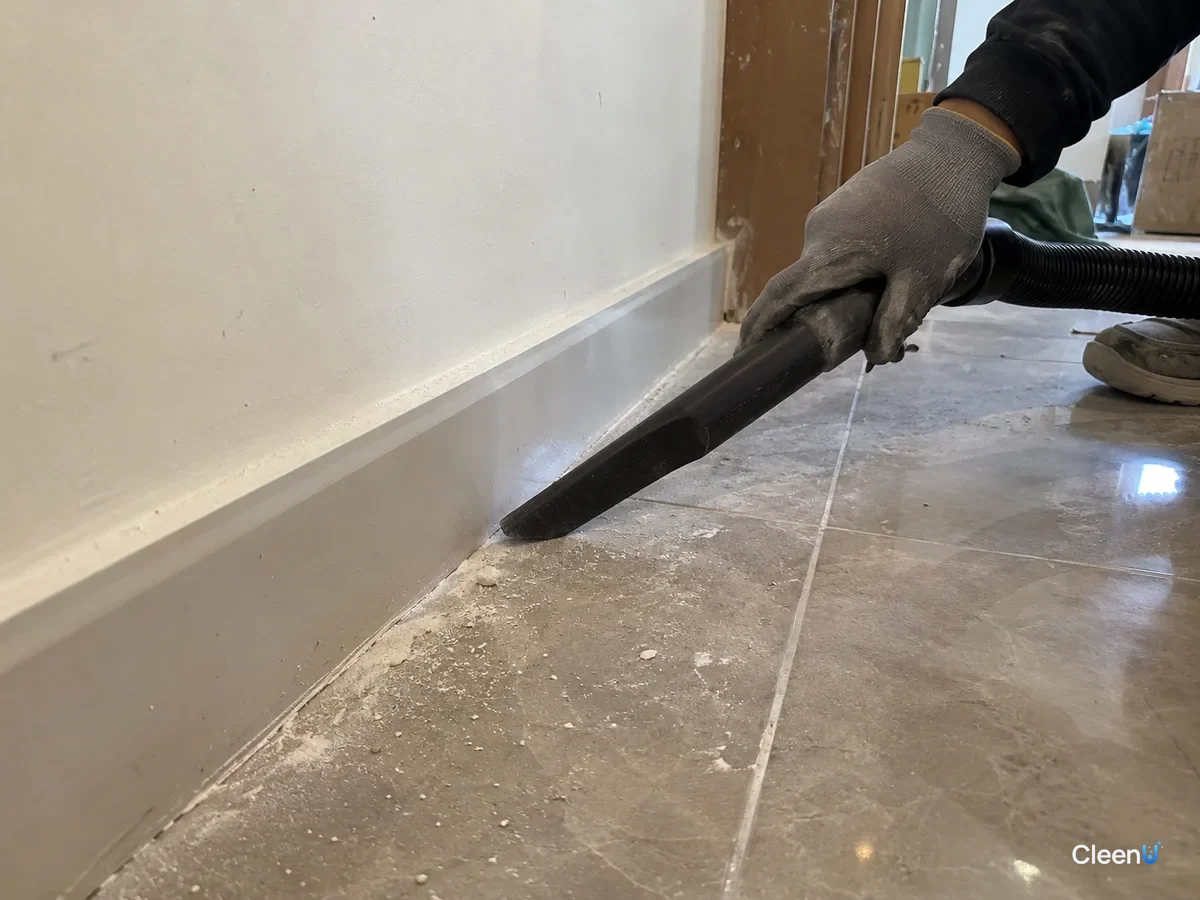
Go along walls, baseboards and grout lines with a shop vac or a strong vacuum with a crevice tool. Wait an hour or two for airborne dust to settle, then vacuum again. Empty or tap out a household vacuum's filter partway through so suction doesn't drop.
Wipe from top to bottom, floor last
Wipe sills, cabinet tops and door frames before the floor so dust doesn't fall onto a floor you've already cleaned. Wipe the floor with a wrung-out damp cloth or flat mop, change the bucket water often and rinse the mop often.
Check for cement haze and adhesive
Once the floor is dry, look at it in side light. A gray-white film on tile that won't wipe off is usually cement haze or grout residue. Treat it by hand with a product made for tile, then wipe with plain water. Spot-treat adhesive with a matching remover.
Caution:Acidic haze removers must never touch marble, terrazzo or other natural stone, and never go in the robot's tank.
Then hand it to the robot
When the floor no longer leaves dust on your hand, run the robot in vacuum-only mode first and clean the bin and filter. Then turn on mopping at a medium water level with solution dosed at the low end. Check the pads and wash tray afterward and clean them as soon as they get dirty.
Stop the robot if you see these
The bin filter is caked with dust and suction drops noticeably; the pads turn stiff and pasty; the wash tray or dirty tank holds a lot of settled slurry; or the floor dries to a white haze. Stop the robot, clean the bin, filter, pads and wash tray, and go back to hand cleaning until most of the dust is gone before letting the robot take over.
After the robot takes over: the first week or two
For a week or two after a renovation, dust keeps settling out of the air and blowing out of cabinets, corners and air vents. During that stretch, have the robot do a few extra things.
Vacuum before mopping: run a full vacuum pass before every mop so the pad meets less dust.
Clean the bin and filter often: for the first few runs, empty the bin and tap out the filter after every run. If the filter turns gray and stiff, wash and dry it or replace it as your manual directs.
Clean the pads and wash tray often: after the dock self-cleans, rinse the wash tray and its filter by hand every day or two so slurry doesn't settle. For maintenance timing, see robot vacuum maintenance schedule.
Dose at the low end: CleenU Robot Vacuum Cleaning Solution dilutes at about 1:50 to 1:100, with 10 to 20 mL per fill usually enough. During this period use the low end, and if there's a lot of dust, mop again instead of adding more solution. Extra solution mixed with fine powder makes white marks more likely.
CleenU Robot Vacuum Cleaning Solution works in most robot mops from Roborock, iRobot (Roomba Combo and Braava), Ecovacs Deebot, Dreame and Narwal, and in floor washers such as Tineco. Add it to the clean water tank or the dock's designated detergent compartment as your manual directs. CleenU isn't affiliated with these brands; the names only indicate compatibility.
Post-renovation care by floor type
Tile and vinyl plank: the most forgiving floors after a renovation. Focus on dust in the grout lines and on cement haze. Loosen grout-line dust with a soft brush, then vacuum it up.
Hardwood and laminate: before wet mopping a newly installed wood floor, make sure the finish has fully cured and the seams are sound. Remove construction dust mostly by vacuuming, and wring the cloth out well when you damp-wipe so water doesn't seep into the seams. For everyday settings on wood, see robot mop on hardwood floors.
Marble and terrazzo: sensitive to acid, so cement haze can't be treated with acidic products. Use a stone-care professional's method. Remove dust mostly by vacuuming here too, so grit isn't dragged across the stone and doesn't leave fine scratches.
White marks: construction dust or cleaning solution?
White marks after mopping a renovated floor can come from three sources, and each needs a different fix.
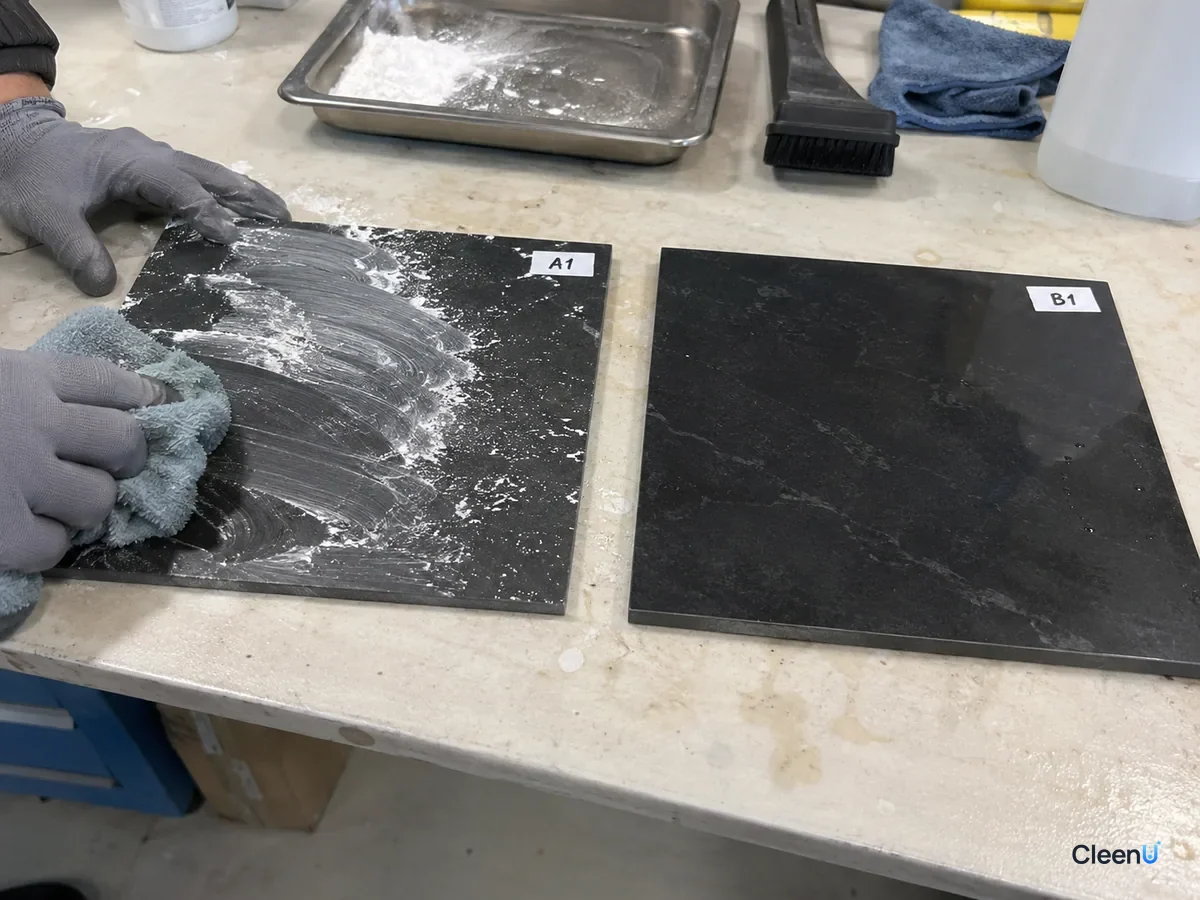
Leftover construction dust: wipe the floor with a dry dark cloth. If it comes up covered in white powder, the dust isn't gone yet; keep vacuuming and damp-wiping.
Cement haze: neither water nor cleaning solution removes it. In side light it's an even gray-white film that feels gritty under a fingernail. It needs a dedicated product applied by hand.
Cleaning solution residue: one pass with plain water makes a clear difference, which means too much solution went in. Use less next time. For tracking down residue, see robot mop leaving streaks.
Common questions about robot mopping after a renovation
Can I run the robot mop right after the renovation?
Not yet. Vacuum and damp-wipe by hand to remove the bulk of the dust, then let the robot vacuum first and mop last. Mopping straight away turns the dust into white paste and clogs the filter and pads.
Can construction dust damage a robot vacuum?
Heavy fine dust clogs the filter and cuts suction, and dust in the motor and airway isn't good for it. Sharp debris can jam the side brush. Clear the bulk of the dust first and you avoid these problems.
Can a robot mop remove cement haze from tile?
No. Cement haze needs a tile-safe haze remover applied by hand, and those products can't go in a robot's tank.
Should I add more solution for the first few passes?
Use less, at the low end. With a lot of dust, mop more times and wash the pads more often. Extra solution plus fine dust leaves white marks.
How do I wash pads caked with dusty paste?
Rinse the slurry out with plain water, then soak and scrub them in warm water with a little laundry detergent, rinse well and air-dry. Replace pads that stay stiff or dirty.
How soon can I wet-mop a newly installed wood floor?
Follow the flooring maker's instructions, and wait until the finish has cured and the seams are stable. Until then, stick to vacuuming and wiping with a well-wrung cloth.
My new tile still looks gray and feels rough after several robot runs. Why?
It's most likely cement haze, not a weak robot. The haze is an alkaline film that neutral robot solution won't remove; treat it by hand with a cement haze remover suited to your tile, rinse well, then return to routine robot mopping.
Once the construction dust is gone and the robot takes over everyday mopping, for a low-foam, wax-free solution you dose sparingly, try Robot Vacuum Cleaning Solution.
After a renovation, don't hand the first cleanup to a robot mop. Construction dust is ultra-fine joint compound, plaster and cement powder that turns to mud when wet, dries to a white haze and clogs filters, pads and wash trays. The right order is dry before wet and hands before robot: clear the debris, vacuum twice with a shop vac, wipe from top to bottom, treat cement haze and adhesive by hand, then let the robot vacuum once before it mops. For the first week or two, clean the bin, filter and wash tray often, dose solution at the low end and mop again when there's more dust. Acidic haze removers belong only on tile, by hand, never in the tank and never on natural stone.